Custom HTML

Many customers have requested more design functionality. UX is going to be our top priority for the month of April — We have a whole slew of fantastic features planned…

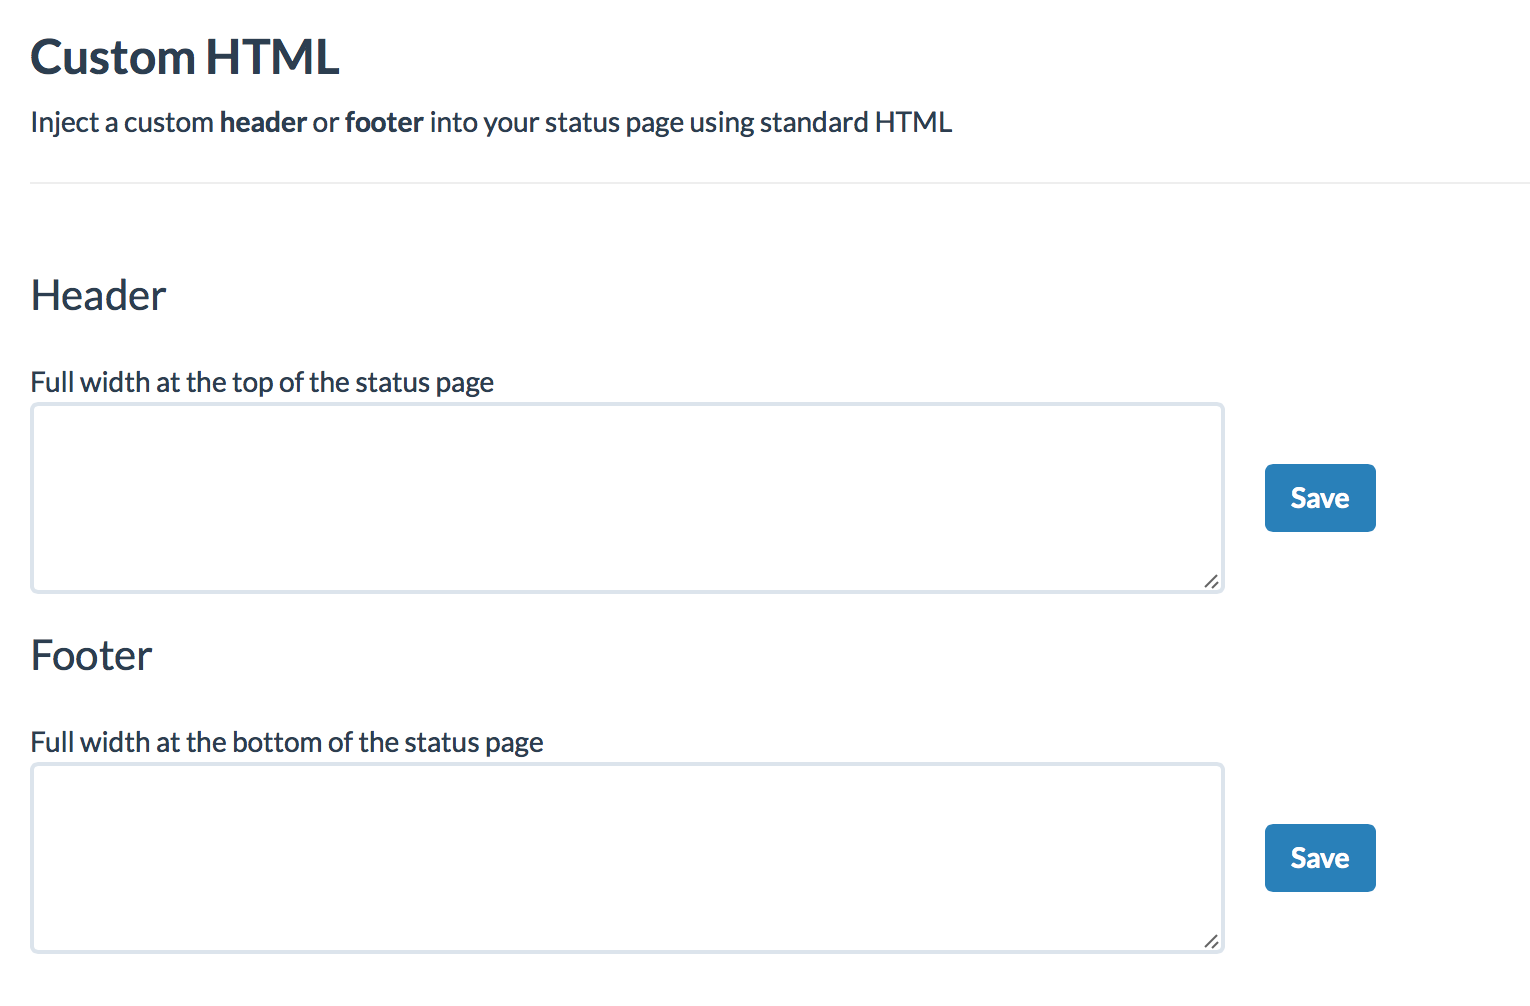
In the mean time, we are rolling out some minor pieces of the design puzzle. Today we’re announcing official support for custom HTML.

Write your own code and it will be injected into the header and footer areas of your status page.

This is a great place to link back to your website, engineering blog, social media or pretty much whatever your heart desires.

Get started in the Dashboard Design view.

custom-html-settings

We’re always happy to help if you run into any issues or have a suggestion. Contact us anytime.

Custom Status Level Colors

Status level colors are used to visually indicate the current status of a specific component, container or incident.

Example: The table of components at the top of the status page are each colored according to the current status.

Here’s what each color means:

Green — OK / Operational

Blue — Maintenance

Orange — Warning / Partial outage / Degraded performance

Red — Emergency / Major outage / Security issue

Up until now, every status page used the same shade of each color.

Starting today you may choose your own colors. Use the Dashboard Design view to pick your colors.


custom-status-level-colors

Toggle Component Status

Instead of strictly controlling the status of components with incidents or maintenances, you may now toggle the status of each component right from your Dashboard.

This functionality already existed within our API and it’s also how we implemented automated status toggles via emails and Pingdom. Now you may do it manually.

To change a component status, click the container and then choose from the component drop-down.


component-status-toggle

Two Factor Auth

In an effort to protect your status page from brute-force attacks and stolen credentials, we released support for Yubico Yubikey two factor authentication.

It’s super simple to set up.

  1. Get a Yubikey device! You can purchase them here.
  2. Sign in to your Status.io account and navigate to the Account view.
  3. Enter your OTP using the Yubikey

yubikey-not-active

4. If the Yubikey connection was successful your account will say Yubikey Connected

yubikey-connected

That’s it! Every time you sign in to Status.io you can just tap your Yubikey while selecting the OTP field.

yubikey-signin

We’re always happy to help if you run into any issues or have a suggestion. Contact us anytime.